Table of Contents
A bootable USB is a USB flash drive that has been specially prepared for install Or repairing your computer Operating e.g: windows, linux, Ubuntu and many more. This is useful for installing or repairing Windows on systems that cannot boot from a CD or DVD. Tools like PowerISO can burn an ISO file (a disc image) to a USB drive so it becomes bootable. For example, PowerISO’s official documentation confirms it can create Windows installation USB drives from an ISO. Below we explain the steps to do this on a Windows PC.
Requirements
- A Windows ISO file. you’ve to download it, we’ve mentioned the link below to download.
- An empty/formatted USB flash drive.(8 GB or larger).
- PowerISO installed on your Windows PC. You’ve to install powerISO before we get started.
Getting Things Ready
Step 1: Download and Install PowerISO
- Download PowerISO visit download page.
- The Provided link will download a RAR file, extract it using WinRAR.
Step 2: Download Windows ISO File
- To Download Windows ISO file visit: @Getintopc.
Now Its Time To Make a Bootable USB
Step 1: Launch PowerISO and Insert USB
- Open PowerISO “Run as Administrator“.
- Plug in the USB drive in your computer (make sure it is connected properly).
- The USB should be at least 8 GB in size (larger is better).
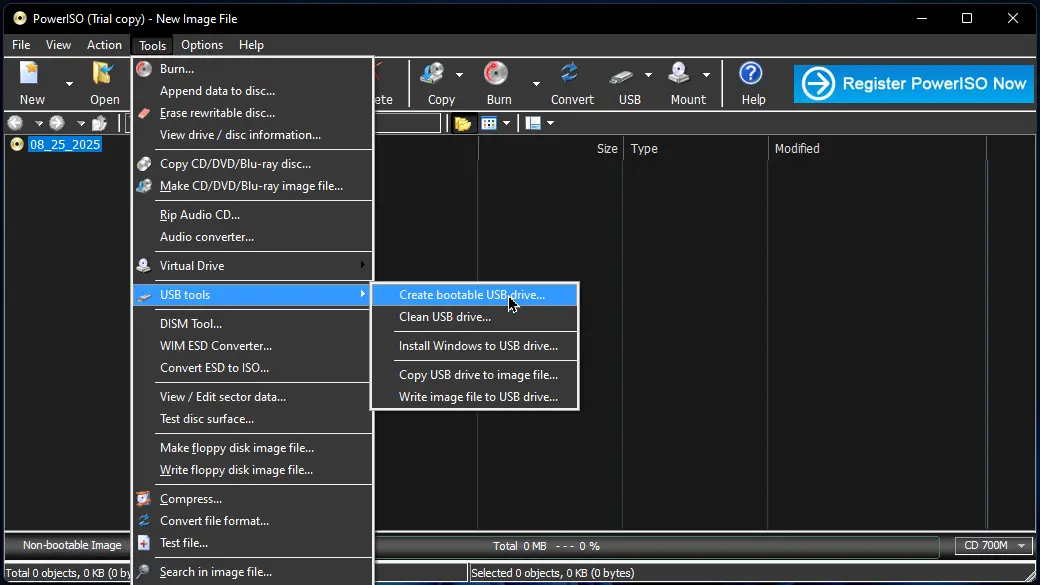
Step 2: Open the USB Creation Tool
- In the upper left corner click on “Tools > USB Tools > Create bootable USB drive “.
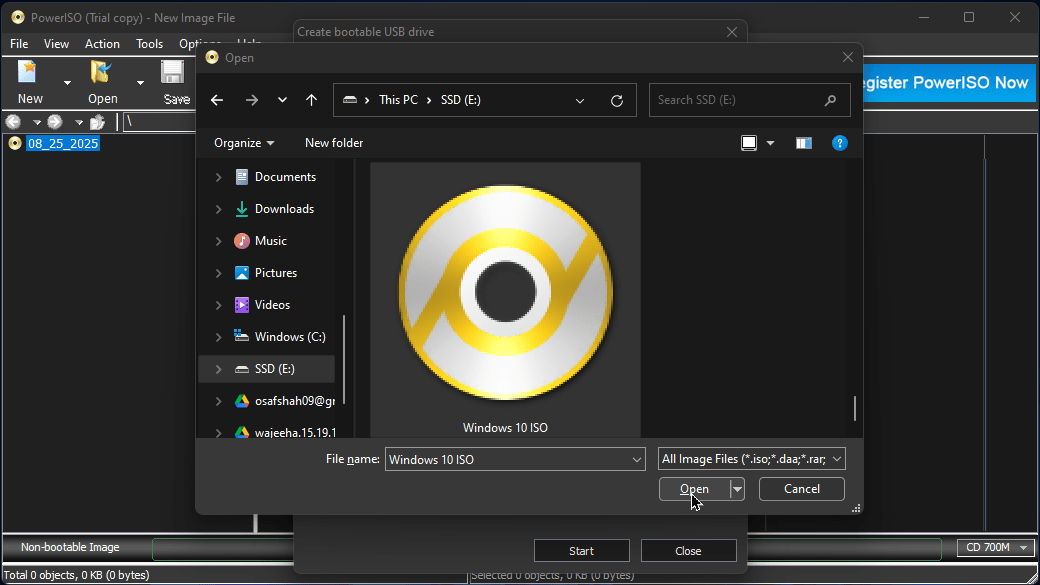
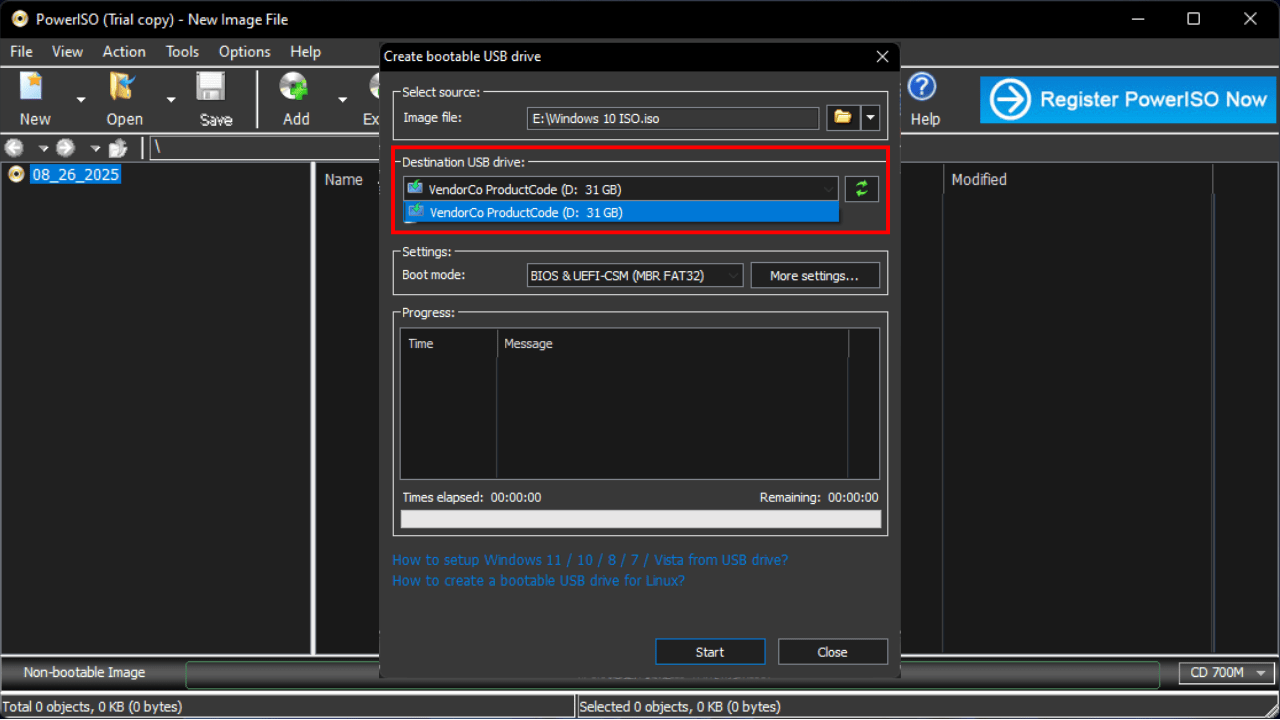
Step 3: Select the Windows ISO File & USB Drive
- In the dialog, click “Browse” folder icon to locate your file from your system.
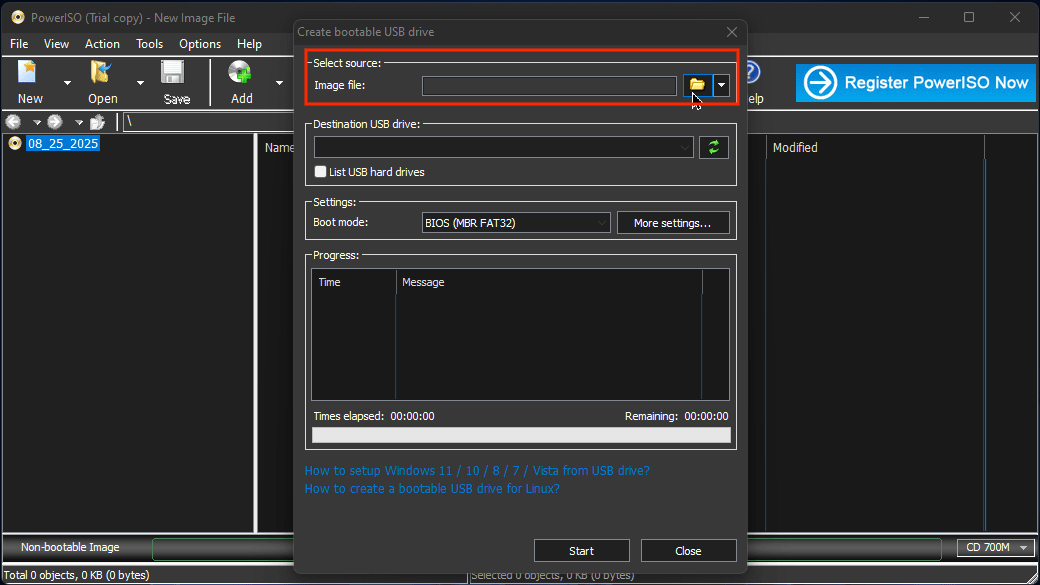
- Now, select “Windows ISO” file that we have downloaded earlier and hit “Open“.
- “Insert” and “Select” the USB drive that you want to make bootable.
Note: If you have connected multiple external drives, please make sure that you have selected the right one (otherwise your data will be lost).
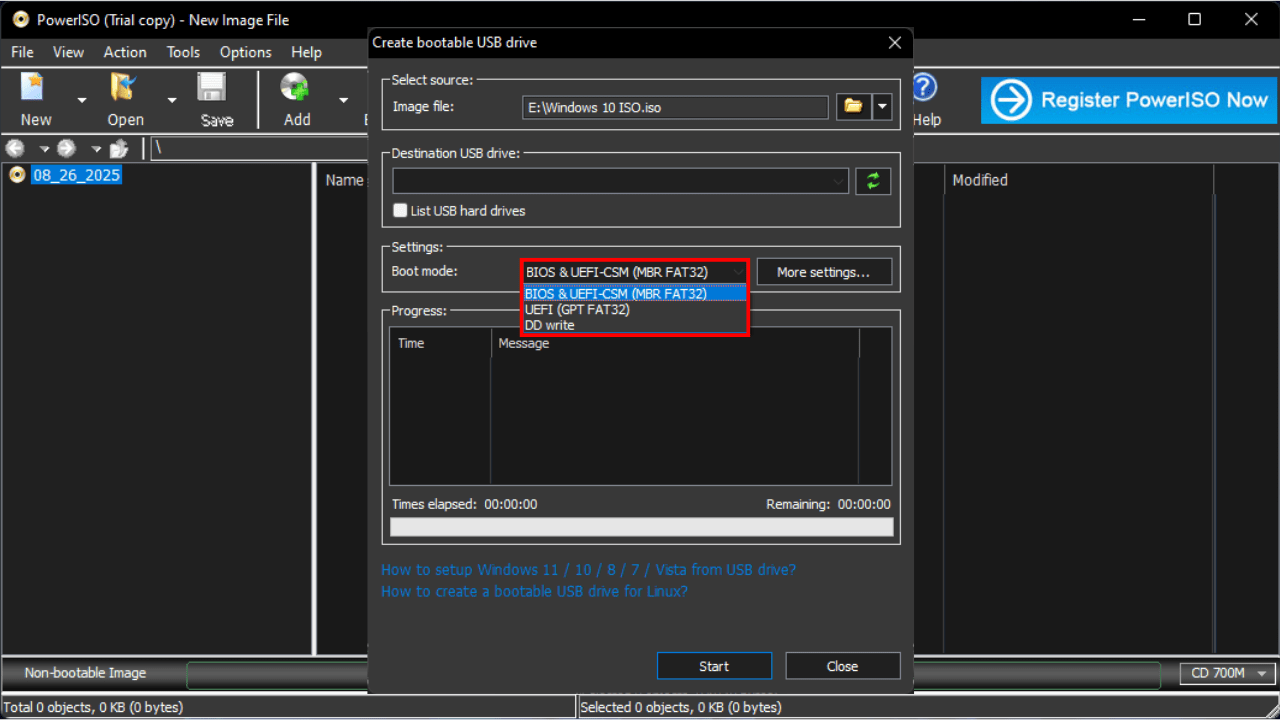
Step 4: Configure Boot Settings
- Choose the boot mode that supports your system.
- For modern PCs, select “UEFI“, for older machines, select “BIOS (Legacy)“.
- If you are not sure which boot mode your system supports, leave it as default.
Warning: The default boot mode may not always work. Check your system’s boot mode first check now.
- Now that you’ve completed all the steps, simply click the “Start” button to create your bootable USB drive.

- Once the progress bar reaches 100% (it might take 5 to 7 minutes).
- Congratulations! your bootable USB drive is ready to use.
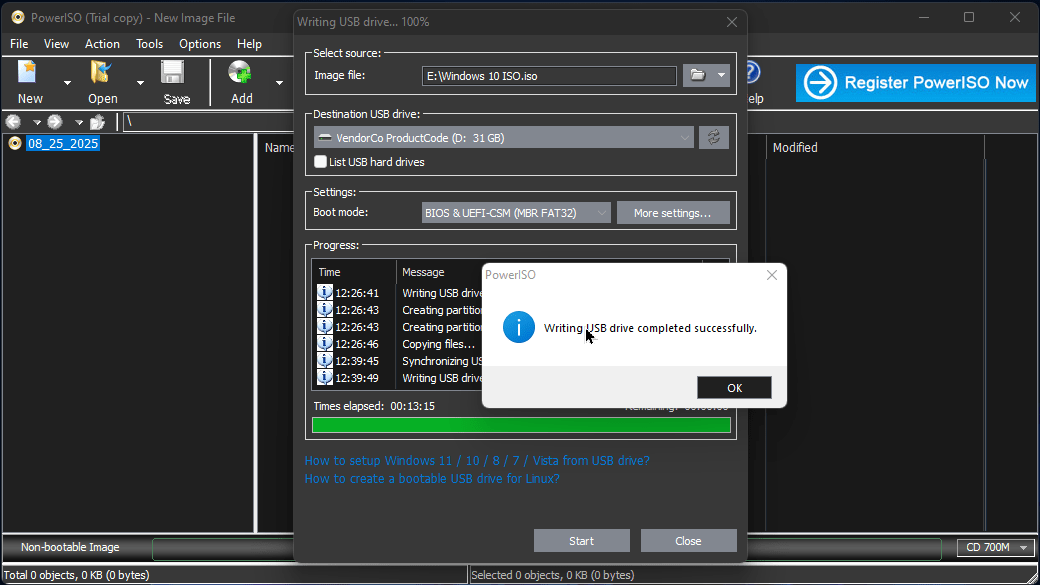
You have successfully created a bootable usb drive. Now, you can close the program.
Tips for Ensuring Your Bootable USB Works
Following these tips improves the chances that the bootable USB will work correctly.
Use a Reliable, High-Speed USB Drive
Choose a good-quality flash drive (USB 3.0 or better) from a known brand. A capacity of 16 GB or more is recommended, as newer Windows ISOs are large.
Back Up Data on the USB First
Creating a bootable USB will erase all existing data on the drive. Before proceeding, copy any important files off the USB stick.
Verify the ISO File
Make sure the Windows ISO file you are using is complete and not corrupted. It’s best to get it from Microsoft’s official site.
Try Different Ports if Needed
If the computer does not detect the USB, try plugging it into another port. Many older PCs boot more reliably from USB 2.0 ports. rather than USB 3.0.
Match the Boot Mode
Make sure the mode (UEFI or Legacy/BIOS) you chose in PowerISO matches your PC’s firmware. If a USB created for UEFI doesn’t work on an older BIOS system (or vice versa), recreate it with the alternate boot mode.
Recreate the USB if There Are Errors
If the USB still won’t boot or shows errors, try creating it again. Sometimes the write process can fail; using a different USB stick or USB port can help fix the issue.
Alternative Tools To Make Bootable USB
Besides PowerISO, other tools can create bootable USB for Windows. Here are a few alternatives:
Rufus
Rufus is free to use. It supports Windows, Linux, and many other operating systems. Rufus cannot create a bootable USB drive online. If you want to use it, you’ll need to download the Windows ISO file.
Rufus is better for those who want to create a bootable USB using a Windows ISO file. It works offline, and you don’t need an internet connection like with the Windows Media Creation Tool. It is fast, easy to use, and beginner-friendly. Also, it is very lightweight and portable, which means you don’t need to install it.
If You want to download Rufus visit: @Rufus
Windows Media Creation Tool
The Windows Media Creation Tool is Microsoft’s official utility for creating Windows installation USB drives. You can download it from Microsoft’s website, and it automatically fetches the latest Windows installer and writes it to your USB stick. Unlike Rufus and PowerISO, it won’t work offline, and it does not allow you to choose your own ISO file. Instead, it downloads the latest version directly from Microsoft. You can only select the system type (32-bit or 64-bit) and choose between Windows 10 and Windows 11.
If you want to download Windows Media Creation Tool visit: @Microsoft
Conclusion
Making a bootable Windows USB drive on a Windows PC is straightforward with PowerISO. You simply launch PowerISO, create a bootable USB drive with ease, and select your Windows ISO and USB stick. It won’t take long — the process will be quick and easy.
PowerISO is safe and very lightweight software, so you can definitely go with that. We also have alternative tools like Rufus and the Media Creation Tool. It depends on your choice how you want to make a bootable USB drive. For offline installation, we prefer PowerISO and Rufus — both will work fine. For online installation, the Media Creation Tool will be the perfect solution.

Way cool! Some extremely valid points! I appreciate you writing this article and the rest of the site is also very good.